Monday 7 December 2009

SALOME, on the way to cross-platform

SALOME running on Mac OS X

Unfortunately, I don't have a Mac machine and thus I didn't get any experience on a Mac, because of its big price :(. However, I do suggest you read here if you want to use SALOME on Mac OS X. There is also a nice picture which might bring some hope if you are facing problems.


SALOME version 5.1.2 for Windows platform

Although I knew SALOME was ported onto Windows platform, I didn't try, because regarding such a huge and complicated software package, I don't expect more. However, I also admit that if the Windows version can run well, it is significantly helpful to those who are not familiar with Linux enough. Then I tried this Windows version and, surprisingly, found it works like a charm. Python, C/C++, QT and all of the cross-platform languages and libraries do give us an option to create programs which is compatible with both Linux and Windows simultaneously. It is totally awesome.

Ok, let's look at this SALOME for Windows. From

http://files.salome-platform.org/cea/adam/salomewindows/download/

the zip package (and a patch file) can be downloaded. Unpack the package to wherever you like, run the bat file release\salome.bat, and SALOME will be launched. Its appearance is exactly the same as in Linux. I tried to load a python script I previously wrote. It worked very well.

The patch file salome_utils.py should be copied to the directory release\modules\KERNEL_INSTALL\bin\salome.

Do you want a go?

SALOME version 5.1.3 for tests on Windows

SALOME version 5.1.3 is recently released by CEA/DEN, EDF R&D and OPEN CASCADE on 14th Dec. 2009. As mentioned, it is a public maintenance release that contains planned major and minor improvements plus bug fixes against SALOME version 5.1.2. Read the news for more details and the download page is here.

According to the message published on the SALOME forum, A SALOME 5.1.3 for tests on Windows came to be available on 18th Dec. 2009. The download address is still at http://files.salome-platform.org/cea/adam/salomewindows/download/. The previous version 5.1.2 was moved to the directory "old". Addtionally, a list of known problems can be found at http://sites.google.com/site/wikisalomeplatform/Home/salome-windows/salome-windows-errata.

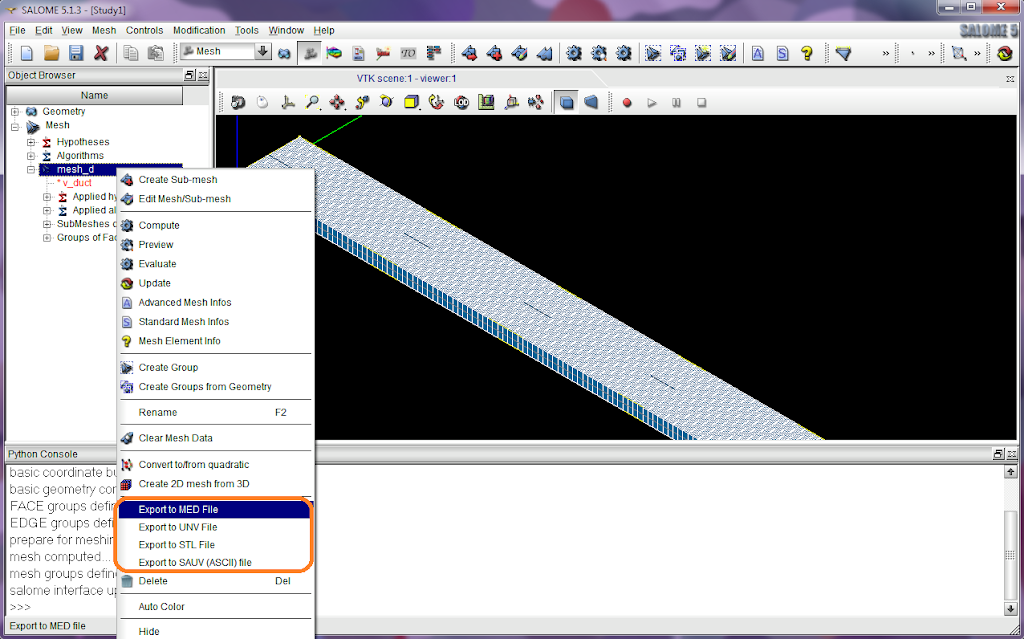
Probably, for those who are looking forward to using SALOME on Windows, screenshots could bring more pleasant surprises. The screenshots below were taken from Windows 7.


You can also compile SALOME on windows if you like. See a howto at http://sites.google.com/site/wikisalomeplatform/Home/salome-windows/5-1-3/howto-compile.

Sunday 6 December 2009

Gambit and Fluent on 64 bit Ubuntu

Installation

It seems that Gambit doesn't include a 64 bit version. However, 32 bit Gambit can be installed and used on a 64 bit Ubuntu (I tried on a Ubuntu 9.10 amd64). When trying to launch it, there will be an error saying the ARCH is not compatible. The solution is exporting a variable "FLUENT_ARCH" before the go.

:/$ export FLUENT_ARCH="lnx86"

Then Gambit will not complain about the uncompatible architecture.

Different from Gambit, Fluent does include a 64 bit version. But remember the variable FLUENT_ARCH has to be switched back before trying to run a 64 bit Fluent; (similarly, if the Fluent used is also a 32 bit version, the variable value "lnx86" has to be kept).

:/$ export FLUENT_ARCH="lnamd64"

To avoid the inconvenience, launch scripts can be written to simplify the procedure.

Besides, another potential problem which could be encountered when trying to launch Fluent within Ubuntu 9.10 is the lack of libstdc++.so.5 is complained. This library was actually provided via package libstdc++5, which is however abandoned after Ubuntu 9.10. However, it can still be found from a Debian source, by which I downloaded the package libstdc++5_3.3.6-18_amd64.deb and fixed the error.

Tutorial

A helpful tutorial on Gambit and Fluent can be found from here, although it is using Windows.

UDF (User Defined Functions) is important for extending the flexibility of Fluent. A programming guide of UDF can be found from this pdf file, and this is the complete UDF manual.

Example

An interesting wave tank example was found from a useful post. It is for a solution of the 2D laminar fluid flow in a tank with oscillating motion of a wall by using multi-phase models. More instructions on this example can be found from the Fluent website, from which related mesh files can also be downloaded.

A detailed set up procedure of the example was described in this pdf file as well.

Saturday 5 December 2009

Installation of SALOME 5.1.2 on (K)Ubuntu 9.10 64 bit

NEW - A post "Installation of SALOME 5.1.3 on Ubuntu 10.04 (64 bit)" was recently published and recommended if you have already updated to Ubuntu 10.04.

I recently upgraded my Ubuntu 9.04 to the latest 9.10 x86_64 version. In this post I use Kubuntu 9.10 64 bit platform for example to share ideas on some problems you might also encounter when trying to install SALOME 5.1.2. These solutions are compatible with SALOME 5.1.3 and Ubuntu 9.10 as well.

You are recommended to read the basic instructions on how to install SALOME on Ubuntu from "Installation of SALOME 5.1.1 on Ubuntu 9.04", because this post follows that one and only involves the newly fixed problems on 9.10.

1. Error when installing SWIG-1.3.31

This time I didn't compile Code_Saturne before installing SALOME, and I therefore encountered errors complaining the system lacks g++ compiler, since it is impossible to install SWIG from binaries and it has to be built from sources.

The solution is simply installing the compilers:

:/$ sudo apt-get install build-essential

When compiling Code_Saturne, don't need to install the package again.

2. Error when installing HXX2SALOME_5.1.2

The error also occurred when installing SALOME, saying

gzip: stdout: Broken pipe

The reason for this error is because the tar (version 1.22-1) in Ubuntu 9.10 includes a regression. This problem has already been corrected in versions 1.22-1.1 and later, which however are currently not part of Ubuntu 9.10.

In order to solve this, the newer version deb package for proper architecture can be downloaded from Launchpad and installed. For example, I installed tar_1.22-2_amd64.deb and fixed the error.

3. Error related to libg2c.so.0

After fixed the last two errors, although the installation was completed, a warning dialog popped out, saying a mandatory library "libg2c.so.0" was not found. Actually this library file is essential to the mesh module, and if it is absent, the successfully installed mesh module cannot even be initialised.


libg2c is a Fortran/C library. Within previous versions of (K)Ubuntu, it could simply be installed via apt-get (apt-get install libg2c0), but 9.10 does not have this package anymore (or at the moment).

By searching the package, libg2c0 can be found and downloaded. It is worth noting that the package depends on gcc-3.4-base, which is, of course, outdated. Then ignore the dependency, in another word, force to install the package libg2c0.

:/$ sudo dpkg --force-depends -i libg2c0_3.4.6-8ubuntu2_amd64.deb

Now the mesh module could then function.

Thursday 5 November 2009

I am inviting you to Dropbox!

Dropbox is a fabulous application which is really valuable for you to have a try. I tried and truly want to share it with you by inviting you to Dropbox.

By clicking the link below you will get another 250 MB of bonus space (plus the basic 2 GB space) after you sign up and use Dropbox. Hope you are interested.

https://www.getdropbox.com/referrals/NTE1MzQ5NTI5

Sunday 16 August 2009

Installation of Code_Saturne 2.0.0 on Ubuntu 9.04

NEW - A post "Installation of Code_Saturne 2.0-rc1 on Ubuntu 10.04 (64 bit)" was recently published and recommended if you have already updated to Ubuntu 10.04.

Code_Saturne version 2.0.0-beta2 was released at the beginning of this August. Since the user routines were changed into FORTRAN95 (.f90 extension) free format, it is suggested to update onto this version.

Code_Saturne 2.0.0 changed its installation onto "autoconf". Therefore, its compilation can be completed by using a typical procedure "configure && make && make install". If you don't mention a target directory for the "configure" scripts, all code will be installed into /usr/local. With respect to the usage, sourcing of a "cs_profile" file is not needed anymore, and you can directly use a unique "cs" script under /usr/local/bin.

The following is an instruction on how to compile Code_Saturne 2.0.0-beta2 on Ubuntu 9.04.

First of all, for CS 2.0.0, install necessary packages by using apt-get.

# for compiling source code
:/$ sudo apt-get install build-essential gfortran libxml2 libxml2-dev
# install BLAS mathematic libraries
:/$ sudo apt-get install libatlas-headers libatlas-base-dev
# for openmpi (support for parallel computing)
:/$ sudo apt-get install openmpi-bin openmpi-dev libibverbs-dev
# for ssh-server (support for parallel computing)
:/$ sudo apt-get install openssh-server
# for GUI
:/$ sudo apt-get install python-qt4
# for GUI, provide pyuic4, pyrcc4 and pylupdate4
:/$ sudo apt-get install pyqt4-dev-tools
# optional, only necessary if compile MEI
:/$ sudo apt-get install bison flex swig python-dev
# for LaTeX documents
:/$ sudo apt-get install tetex-bin tetex-base
# for LaTeX documents, provide fig2dev
:/$ sudo apt-get install transfig
# for LaTeX documents, provide epstopdf
:/$ sudo apt-get install texlive-extra-utils

Download packages bft-111, fvm-0140, ecs-200 and ncs-200 from the official website, and then together with the extra downloaded packages, metis-4.0, hdf5-1.6.9 and med-2.3.5, extract these packages into a temporary directory, in which you can "configure; make; sudo make install" them one by one.

1. Compile metis-4.0, hdf5-1.6.9, med-2.3.5 and bft-1.1.1

# ship into metis-4.0
:/$ make
:/$ cp graphchk kmetis mesh2dual mesh2nodal oemetis onmetis partdmesh partnmesh pmetis /usr/local/bin/
:/$ cp libmetis.a /usr/local/lib/
:/$ cp Lib/*.h /usr/local/include/

# ship into hdf5-1.6.9
:/$ ./configure --prefix=/usr/local
:/$ make
:/$ sudo make install

# ship into med-2.3.5
:/$ ./configure --with-hdf5=/usr/local
:/$ make
:/$ sudo make install

# ship into bft-1.1.1
:/$ ./configure
:/$ make
:/$ sudo make install

2. Compile fvm-0.14.0

# ship into fvm-0.14.0
:/$ ./configure --with-mpi=/usr/lib/openmpi
:/$ make
:/$ sudo make install

3. Compile ecs-2.0.0

# ship into ecs-2.0.0-beta2
:/$ ./configure
:/$ make
:/$ sudo make install

4. Compile ncs-2.0.0

# ship into ncs-2.0.0-beta2
:/$ ./configure --with-mpi=/usr/lib/openmpi --with-prepro=/usr/local LIBS=-lm
:/$ make
:/$ sudo make install
# optional, to produce and install pdf documents
:/S cp ~/fullpage.sty ~/lastpage.sty doc/style/
:/$ make pdf
:/$ sudo make install-pdf

After this is finished, use "cs config" to check the status of the newly installed Code_Saturne 2.0.0 beta2.

Ps, this instruction did not include the compilation of MEI, because I encountered an error during my trying it. I thought it is okay to ignore this error. However, after finishing the whole installation, I found the option "user law" was grey and disabled.

make[1]: Entering directory `/home/salad/Code_Saturne/src/mei-1.0.0/pytests'
cp: `../pytests/mei_test.py' and `../pytests/mei_test.py' are the same file
make[1]: *** [all] Error 1

Sunday 9 August 2009

Linux/Ubuntu on a Lenovo ThinkPad

I installed Ubuntu 9.04 onto my ThinkPad T61. ThinkPad series is famous to be Linux friendly, and also because the big improvement of Linux/Ubuntu, after I finished the installation, I found most hardware drivers are installed and ready to use, even including the Fn keys. It is a shame that I still have more than 569 MB ThinkPad driver files for Windows XP stored on my harddisk.

* CPU Temperature and the Cooling Fans

A very useful tool GNOME Sensors Applet can indicate CPU, harddisk and GPU temperatures as well as cooling fan speed. Use apt-get to install the applet and monitor what you want.

:/$ sudo apt-get install sensors-applet

Although it is BIOS's responsibility to optimize the cooling fan speed in order to limit the temperatures, another tool ThinkPad Fan Control (tp-fan) allow you to control the fan speed manually. To install tp-fan, enable its PPA source, and then use apt-get

:/$ sudo apt-get install tpfand

However, it is not recommended to use tp-fan to adjust the temperature thresholds controlling the fan running level.

Actually, by looking up proc files under /proc/acpi/ibm ThinkPad runtime status can be obtained, including the cooling fan. Then it is known that the fan has 0-7 eight levels to be running at.

:/$ cat /proc/acpi/ibm/fan

* FingerPrint Reader

Install ThinkFinger to use the FingerPrint Reader device.

:/$ sudo apt-get install thinkfinger-tools

Its usage is detailedly described on "Install ThinkFinger on Ubuntu".

* Harddisk Active Protection System (APS)

First of all, it is necessary to download these packages. You have to compile them manually except the third one, the script. Actually, the first one is already available in the system, and the second one can be easily installed by using apt-get; however, these binary versions cannot work as expected.1. Unpack, compile and install tp_smapi. Then modify /etc/modules and /etc/modprobe.d/local.conf. Load the modules

:/$ sudo modprobe thinkpad_ec tp_smapi hdaps

Please refer to Reference 1.

2. Use typical "./configure --prefix=/usr/ && make && sudo make install" to build hdapsd. hdapsd will be installed into /usr/sbin/. hdaps-gl, in package hdaps-utils, can be used to test hdaps. Refer to Reference 2.

3. Make the hdapsd script executable, copy it into /etc/init.d/, and then run it.

:/$ chmod +x hdapsd
:/$ sudo cp hdapsd /etc/init.d/
:/$ sudo /etc/init.d/hdapsd start

4. Build the GNOME hdaps applet and install it. Then add the applet onto a GNOME panel. The applet is an indicator to show whether the magnetic head of the harddisk is parked.

:/$ sudo apt-get install libpanel-applet2-dev
:/$ cd ~/gnome-hdaps-applet-20081204
:/$ gcc $(pkg-config --cflags --libs libpanelapplet-2.0) -o gnome-hdaps-applet gnome-hdaps-applet.c
:/$ sudo cp gnome-hdaps-applet /usr/bin/
:/$ sudo mkdir /usr/share/pixmaps/gnome-hdaps-applet/
:/$ sudo cp *.png /usr/share/pixmaps/gnome-hdaps-applet/
:/$ sudo cp GNOME_HDAPS_StatusApplet.server /usr/lib/bonobo/servers/

5. Refering to Reference 2, smartctl can be used to look up the park times of the magnetic head of harddisks. Among the smartctl output, the last number of the line, which contains "Load_Cycle", is the park times.

:/$ sudo apt-get install smartmontools
:/$ sudo smartctl -a /dev/sda | grep Load_Cycle

This park times has a limitation in an alive harddisk. It implies frequently parking the head is not a good idea either. Therefore, default value for the parameter "SENSITIVITY", 15, is too low. We can make it higher, for example, to 50, by modifying /etc/default/hdapsd.

# sensitivity
SENSITIVITY=50

Actually, on Windows I guess it is also necessary to adjust the 'shock detection sensitivity' lower to 'medium'.


References:

1. Enabling Active Protection System on a ThinkPad T61

2. X200下的HDAPS妖魔鬼怪

Friday 24 July 2009

Installation of Code_Saturne 1.4.0 on Ubuntu 9.04

CS 1.4.0 is in beta stage.

A newly introduced feature is the rewritten GUI code, which is based on PyQt4. Therefore, we have to install PyQt4 module rather than tk/tix for CS 1.3.3.

:/$ sudo apt-get install python-qt4

The compiling process of 1.4.0 is quite similar to 1.3.3. You can even use the same instruction I wrote to compile the code and then use it.

Another very useful tutorial on installation of Code_Saturne 1.4b on Ubuntu 8.04 can be found from the CAE Linux wiki, although it is a bit outdated.

It is also worth mentioning that if you already have a compiled version of CS 1.3.3, you can reuse all the existing libraries in "src". Just specify them in the "setup" configuration file and you do not need to compile them again.

Ps, I couldn't make the parallel computing in CS 1.4.0 work yet. I found if I use more than one CPUs, they will be endlessly running all the time. I am still looking for the probably existing errors. Please give hints if you already solved it. Many thanks in advance.

Installation of ParaView 3.6.1 on Ubuntu 9.04

Actually you can install ParaView with apt-get on Ubuntu 9.04 (should also be true for older versions than 9.04). However, probably this ParaView isn't the latest version.

:/$ sudo apt-get install paraview

If we want to use the latest version, please fetch the binary package from here. Up to now the latest version is 3.6.1. In terms of the Linux version, 3.6.1, 157 MB, is much bigger than the previous 3.4.0, 44.5 MB. The Windows version is smaller.

After you obtain the package paraview-3.6.1-Linux32-x86.tar.gz please just unpack it into any directory you prefer. Ship into paraview-3.6.1-Linux32-x86/bin/ and execute "paraview" to run the software.

An easier way is add paraview-3.6.1-Linux32-x86/bin/ to your $PATH variable, and then you can run paraview from anywhere.

By the way, as previously mentioned, ParaView is a cross-platform application, i.e. it is also possible to install ParaView on Windows and Macintosh OS. It would be beneficial if you are using a remote UNIX computer to do the calculation work and prefer to show and analyse the calculation results obtained on your Windows desktop.

Polishing GUI of older SALOME versions

I was using SALOME 4.1.4 before. Not like SALOME 5.1.1, the GUI in 4.1.4 is written based on QT 3. If you found the appearance of this GUI is not elegant as you expect, maybe a method can be borrowed to polish it.


Matter of fact, a tool named qt3-qtconfig can be used to adjust the QT 3 program appearance. The modification will be applied onto all QT 3 programs in the system. Use apt-get to install the tool.

:/$ sudo apt-get install qt3-qtconfig

I suggest the theme "polymer" for QT 3. Use apt-get to install the theme.

:/$ sudo apt-get install polymer

After they are installed, run "qtconfig-qt3" to apply the "polymer" theme. Actually, with the tool it is also possible to specify Font Family used for QT 3 programs. I prefer 'Bitstream Vera Sans' size 9. You can choose whatever you like.

I have turned to SALOME 5.1.1 already. It is therefore a pity that I cannot take screenshots to show the effect. Please try to see if you are interested.

Monday 20 July 2009

Installation of Code_Saturne 1.3.3 on Ubuntu 9.04

Installation of Code_Saturne (CS for short) is a process of compiling. Therefore, before compile the code packages (download from EDF R&D), you are supposed to

1. Install necessary packages using apt-get. They are listed below:

# for compiling
:/$ sudo apt-get install build-essential gfortran libxml2 libxml2-dev
# for GUI
:/$ sudo apt-get install libx11-dev python-tk tix
# for LaTeX documents
:/$ sudo apt-get install tetex-bin tetex-base transfig texlive-extra-utils
# for openmpi (support for parallel computing)
:/$ sudo apt-get install openmpi-bin openmpi-dev libibverbs-dev
# for ATLAS mathematic library (check CPU flags first)
:/$ cat /proc/cpuinfo | grep flags
:/$ sudo apt-get install libatlas-headers libatlas-sse2-dev


2. Create and tidy a HOME directory for CS. I prefer mkdir a dir called Code_Saturne under my home directory.

:/$ mkdir Code_Saturne
:/$ cd Code_Saturne
:/$ mkdir Noyau Enveloppe Interface src

Unpack the downloaded install script package directly into "Code_Saturne" and a sub-dir "Install" will be created. Ship into Install and read through README.txt document. According to this document, we should

*. extract ncs package into Noyau
*. extract ecs package into Enveloppe
*. extract ics package into Interface
*. extract packages bft, fvm, hdf5, med, metis into directory src

(metis is only for parallel computing. hdf5 and med are only for supporting a MED file format. They are optional.)

3. Then we need some modifications on the source codes we extracted. These modification hints are all based on my experiences. Probably you won't encounter problems if you don't follow them, but I did. Therefore, I tried to solve the problems and recorded the solutions here.

*. For Noyau/ncs-1.3.3/bin/macros_Linux.mk, find the line

BLAS_LDFLAGS =-lcblas -latlas

add "-L$(BLAS_HOME) " to this line, like this:

BLAS_LDFLAGS =-L$(BLAS_HOME) -lcblas -latlas

*. In order to compile LaTeX documents, you need to Google and download a file named "lastpage.sty". Then copy it into the three directories under Noyau/ncs-1.3.3/doc/

:/$ cp lastpage.sty Noyau/ncs-1.3.3/doc/THEORY/latex/
:/$ cp lastpage.sty Noyau/ncs-1.3.3/doc/TUTORIAL/latex/
:/$ cp lastpage.sty Noyau/ncs-1.3.3/doc/USER/latex/

*. For src/hdf5-1.6.8/perform/zip_perf.c, change line 549 to

output = open(filename, O_RDWR | O_CREAT, S_IRWXU);

*. For src/med-2.3.4/include/MEDerreur.hxx, make it writable first

:/$ chmod u+w include/MEDerreur.hxx

and then add this line to the head of the file.

#include <cstring>


4. Modify the "setup" configuration file under the directory Code_Saturne/Install/. setup file defines which libraries will be used and which libraries will be compiled. Some of the libraries are optional, therefore by default, the initial setup file only configured compilation of bft, fvm, ecs, ics and ncs. I suggest to use additonal libraries blas, metis, mpi, hdf and med, because

*. blas can optimize the calculation speed.
*. metis and mpi enable the ability to perform parallel computing. If you use a dual core computer or a cluster, this is helpful to save lots of calculation time.
*. hdf and med give support to use the MED mesh file format. SALOME can export UNV and MED formats, but MED is smaller than UNV.

In order to use these libraries, setup file has to be configured manually.

*. Find the blas line and modify it into

blas   /usr/lib/sse2      atlas-3.8.2    yes   no

*. Find the metis line and modify it and the following 4 lines together into

metis  None   metis-4.0   yes   yes
mpi /usr/lib/openmpi openmpi-1.2.8 yes no
cgns None cgns-2.5.3 no no
hdf None hdf5-1.6.8 yes yes
med None med-2.3.4 yes yes


5. Finally, compile the whole package. Ship into Code_Saturne/Install/ and execute on terminal

./install_saturne.py

Then the automatic configuration and make process will start. The process needs a while to finish, depending on the power of the computer. Wait for ten minutes and see whether everything is fine and whether it finished successfully.

Installation of SALOME 5.1.1 on Ubuntu 9.04

NEW - A post "Installation of SALOME 5.1.3 on Ubuntu 10.04 (64 bit)" was recently published and recommended if you have already updated to Ubuntu 10.04.

SALOME platform is recently updated to version 5.1.1. This latest version ported the GUI onto the QT 4. For the old version 4.*, in which QT 3 is used, I suggest reading "Polishing GUI of older SALOME versions".

This poster introduces the installation procedure of SALOME 5.1.1. It is not difficult since the whole process is performed with help of a graphical interface and I already extracted the potential problems you might encounter in this article. All of the following instructions are tested on Ubuntu 9.04, and they are also compatible with the latest SALOME 5.1.3. For Ubuntu 9.10, you have to read "Installation of SALOME 5.1.2 on (K)Ubuntu 9.10 64 bit" for additional issues.

Okay, before start installing, we'd better fix two problems in advance.

1. Execute the following two commands

:/$ sudo rm /bin/sh
:/$ sudo ln -s /bin/bash /bin/sh

They replace "sh" with "bash", otherwise, there will be errors during the installation of SALOME, as shown in the following pictures.


2. An old version of the gfortran library libgfortran is necessary to enable the mesh module in SALOME. Execute the following commands to create a symbolic link so as to let a libgfortran.so.1 present. After the link is created, update the search path index.

:/$ sudo apt-get install gfortran
:/$ sudo ln -s /usr/lib/libgfortran.so.3 /usr/lib/libgfortran.so.1
:/$ sudo ldconfig
:/$ sudo updatedb

(ldconfig is used to update /etc/ld.so.cache based on /etc/ld.so.conf, where the non-standard paths are added; updatedb is used to update the index database.)

An error like this will be encountered after the installation if there is no libgfortran existing. Matter of fact, it is also feasible to execute the above commands after the installation of SALOME.


Now you can launch the install script "runInstall" inside the directory InstallWizard_5.1.1_Debian_4.0/, which is obtained by extracting the suitable tar.gz package downloaded from the SALOME website. For Ubuntu 9.04, you can use Debian Etch version.

Run from the terminal:

:/$ ./runInstall

Wait and see the GUI installation wizard, shown as


Following the wizard it is easy to install SALOME. It will take a while to finish the installation. You may see an warning like this after the finished installation. You just leave it. It doesn't matter.


Now you will have two directories "salome_5.1.1" and "salome_appli_5.1.1" at the installation location. Ship into salome_appli_5.1.1 and by running the script "runAppli" you could launch the SALOME software.

:/$ ./runAppli

If encounter an error probably saying that the file .omniORB_%your username%_%your host name%_2810.cfg couldn't be found, you can manually create a sub-directory "USERS" under salome_appli_5.1.1 and try again.

:/$ mkdir salome_appli_5.1.1/USERS

So far the SALOME should be ready to use.

Wednesday 22 April 2009

A short introduction of Linux/Ubuntu

Definitely you can find loads of information from the Internet on Linux/Ubuntu and how to install them. Not like Microsoft Windows, most Linux distributions are free to get and install. It implies you can save money and meanwhile you could also get rid of the annoying license stuff. The only thing you have to pay, you have to spare some time to change your idea on an operating system in order to get used to this "quite different" one. Of course, if Linux is already your habit, this sentence is not said to you.

Nearly all modern distributions of Linux adopt Graphic User Interface (GUI) as their operating environment for desktop versions, and Ubuntu is no exception. The default desktop environment used in Ubuntu is GNOME. Since programs are also encapsulated into windows which are constructed with similar components as on Windows, such as menus, tool buttons and scrollbar etc, I don't think it is quite different. Actually it is Ubuntu/GNOME that I am writing this post within. Therefore, the aspect we have to change is not the style of operating but lies on the applications we are going to use, because not every program was ported onto Linux, especially those commercial software and games like Microsoft Office and Warcraft etc. Whenever you encounter problems, remember using search engines like Google is a good methodology to crack out solutions and there is a big community there to help you.

Another point which makes Linux different from Windows is the frequently employed text commands executed on terminals. At most times, we use command lines because they are more consistent and fluent than any existing alternative GUI ways to complete the same task. For example, most works can be implemented without leaving the terminal window. Secondly, programs running at a terminal have very clear input and output parameters, which could be helpful whenever diagnosis is necessary. Besides, commands are possible to be linked and composed together to build automatic scripts. These scripts can save lots of time when executing fixed work flows.

Therefore, in the posts here, operations will be expressed in commands as much as possible. It is more accurate and convenient to follow than by saying "move your mouse to somewhere" and "click some items" etc. Taking it further, it is also easy to run commands by copy, paste and hit Enter. I guess it is the most efficient way to see their effect.

Choose open-source CFD platform

Code_Saturne is general purpose CFD software developed by EDF R&D. It is an open-source code distributed under the GNU GPL licence and have been ported to Linux PCs and all UNIX platforms. For PCs, it is easy to install and use if a Linux operating system is already installed, while for those supercomputers or clusters, like Cray and Blue Gene, with help of MPI libraries, Code_Saturne can also utilise the potential of their parallel computing ability. You can find more introduction about Code_Saturne from its official website.

It is commonly known that an entire CFD solution procedure can be split into four sequential steps: geometry modelling, meshing, solving and post-processing. Code_Saturne is a CFD solver and as such it can only manage the solving step. Currently, on my Linux PCs, SALOME is chosen to cope with the geometry modelling and meshing steps, while ParaView is used for the post-processing. Both SALOME and ParaView are also open-source software targeted at numerical simulation.

ParaView is a cross-platform software, whereas SALOME and Code_Saturne are mainly released for Linux. Regarding Linux systems, there are quite a lot of distributions to meet various personal demands and most of them can be freely downloaded from their official website. Among these distributions there are some which can be used to start with if one has no experience about Linux before, such as Ubuntu, openSUSE and Fedora etc. My posts focus on Ubuntu (or its variants) and actually the experiences would also be ported to other distributions.

With all software mentioned above, Ubuntu, SALOME, Code_Saturne and ParaView, a free/open-source platform can then be built to provide CFD solutions. Download sites of these software are listed here for convenience:

Ubuntu
SALOME
Code_Saturne
ParaView

In the following posts I will try to introduce the detailed installation procedure for all of them.

Tuesday 21 April 2009

Resources on free CFD codes

General introduction about CFD from wikipedia:

Computational fluid dynamics

A list of free codes on CFD can be found from CFD-Wiki:

http://www.cfd-online.com/Wiki/Codes

where the commercial codes available are also listed side by side.