Monday 24 May 2010

apt-get, the ideal way to install the software onto Ubuntu

Code_Saturne

In the past two years, since I started to use Code_Saturne, I compiled the packages over and over whenever I need to use it. I wrote posts and share my experiences in order to save others' precious time from solving all the compilation problems one might meet with. At the same time, I was also thinking, if we could use the standard apt-get to install Code_Saturne, it would be perfect.

salad@ubuntu:~$ sudo apt-get install code-saturne
Reading package lists... Done
Building dependency tree
Reading state information... Done
Package code-saturne is not available, but is referred to by another package.
This may mean that the package is missing, has been obsoleted, or
is only available from another source
E: Package code-saturne has no installation candidate

David said the code-saturne package is only available in Debian testing. Therefore, I add two lines into my source configuration /etc/apt/sources.list: (Please select a corresponding source which is fast in your area; you can refer to http://www.debian.org/mirror/list)

deb http://mirror.ox.ac.uk/debian/ testing main
deb-src http://mirror.ox.ac.uk/debian/ testing main

Then retrieve the list of packages and apt-get install code-saturne

:/$ sudo apt-get update
:/$ sudo apt-get install code-saturne

Gladly, this time I get positive information saying the packages can be installed.

salad@ubuntu:~$ sudo apt-get install code-saturne
Reading package lists... Done
Building dependency tree
Reading state information... Done
The following packages were automatically installed and are no longer required:
  qt4-doc libswscale0 libavutil49 libpthread-stubs0 libgl1-mesa-dev
  x11proto-kb-dev libqt4-opengl libavcodec52 mesa-common-dev xtrans-dev
  x11proto-input-dev libglu1-mesa-dev libdrm-dev libqt4-multimedia qt4-qmake
  libgsm1 libxau-dev libschroedinger-1.0-0 libavformat52 libx11-dev
  libdirac-encoder0 libxcb1-dev mpi-default-bin libopenjpeg2 x11proto-core-dev
  libxdmcp-dev libpthread-stubs0-dev qt4-designer libfaad2
Use 'apt-get autoremove' to remove them.
The following extra packages will be installed:
  code-saturne-bin code-saturne-data code-saturne-include ecs libaudio2
  libavcodec52 libavformat52 libavutil49 libbft1 libcgns2 libdb4.5
  libdirac-encoder0 libdrm-dev libdrm-intel1 libdrm-nouveau1 libdrm-radeon1
  libdrm2 libfaad2 libfvm0 libgl1-mesa-dev libglu1-mesa-dev libgsm1
  libhdf5-openmpi-1.8.4 libmedc1 libmei0 libmng1 libmysqlclient16 libncursesw5
  libopenjpeg2 libpthread-stubs0 libpthread-stubs0-dev libqt4-assistant
  libqt4-dbus libqt4-designer libqt4-help libqt4-multimedia libqt4-network
  libqt4-opengl libqt4-phonon libqt4-qt3support libqt4-script
  libqt4-scripttools libqt4-sql libqt4-sql-mysql libqt4-sql-sqlite libqt4-svg
  libqt4-test libqt4-webkit libqt4-xml libqt4-xmlpatterns libqtcore4 libqtgui4
  libschroedinger-1.0-0 libsqlite3-0 libssl0.9.8 libswscale0 libx11-6
  libx11-dev libxau-dev libxau6 libxcb1 libxcb1-dev libxdmcp-dev libxdmcp6
  mesa-common-dev mpi-default-bin mysql-common python-qt4 python-sip python2.5
  python2.5-minimal qt4-designer qt4-doc qt4-qmake qt4-qtconfig syrthes
  x11proto-core-dev x11proto-input-dev x11proto-kb-dev xtrans-dev
Suggested packages:
  nas libmed-tools libmed-doc libqt4-dev python-qt4-dbg python2.5-doc
  python-profiler qt4-dev-tools
Recommended packages:
  paraview
The following NEW packages will be installed
  code-saturne code-saturne-bin code-saturne-data code-saturne-include ecs
  libaudio2 libavcodec52 libavformat52 libavutil49 libbft1 libcgns2 libdb4.5
  libdirac-encoder0 libdrm-dev libfaad2 libfvm0 libgl1-mesa-dev
  libglu1-mesa-dev libgsm1 libhdf5-openmpi-1.8.4 libmedc1 libmei0 libmng1
  libmysqlclient16 libopenjpeg2 libpthread-stubs0 libpthread-stubs0-dev
  libqt4-assistant libqt4-dbus libqt4-designer libqt4-help libqt4-multimedia
  libqt4-network libqt4-opengl libqt4-phonon libqt4-qt3support libqt4-script
  libqt4-scripttools libqt4-sql libqt4-sql-mysql libqt4-sql-sqlite libqt4-svg
  libqt4-test libqt4-webkit libqt4-xml libqt4-xmlpatterns libqtcore4 libqtgui4
  libschroedinger-1.0-0 libswscale0 libx11-dev libxau-dev libxcb1-dev
  libxdmcp-dev mesa-common-dev mpi-default-bin mysql-common python-qt4
  python-sip python2.5 python2.5-minimal qt4-designer qt4-doc qt4-qmake
  qt4-qtconfig syrthes x11proto-core-dev x11proto-input-dev x11proto-kb-dev
  xtrans-dev
The following packages will be upgraded:
  libdrm-intel1 libdrm-nouveau1 libdrm-radeon1 libdrm2 libncursesw5
  libsqlite3-0 libssl0.9.8 libx11-6 libxau6 libxcb1 libxdmcp6
11 upgraded, 70 newly installed, 0 to remove and 655 not upgraded.
Need to get 131MB of archives.
After this operation, 245MB of additional disk space will be used.
Do you want to continue [Y/n]?

Accept it and all the related packages will be downloaded and installed. To see if it is really there, type

salad@ubuntu:~$ type code_saturne
code_saturne is hashed (/usr/bin/code_saturne)
salad@ubuntu:~$ code_saturne config
Directories:
  dirs.prefix = /usr
  dirs.exec_prefix = /usr
  dirs.bindir = /usr/bin
  dirs.includedir = /usr/include
  dirs.libdir = /usr/lib
  dirs.datarootdir = /usr/share
  dirs.datadir = /usr/share
  dirs.pkgdatadir = /usr/share/ncs
  dirs.docdir = /usr/share/doc/ncs
  dirs.pdfdir = /usr/share/doc/ncs

Auxiliary information:
  dirs.ecs_bindir = /usr/bin
  dirs.syrthes_prefix = /usr/lib/syrthes/3.4.2

MPI library information:
  mpi_lib.type =
  mpi_lib.bindir =
  mpi_lib.libdir =

Compilers and associated options:
  cc = cc
  fc = gfortran
  cppflags = -D_POSIX_SOURCE -DNDEBUG -I/usr/include/libxml2
  cflags = -std=c99 -funsigned-char -pedantic -W -Wall -Wshadow -Wpointer-arith -Wcast-qual -Wcast-align -Wwrite-strings -Wstrict-prototypes -Wmissing-prototypes -Wmissing-declarations -Wnested-externs -Wunused -Wfloat-equal -g -O2 -g -Wall -O2 -funroll-loops -O2 -Wuninitialized
  fcflags = -x f95-cpp-input -Wall -Wno-unused -D_CS_FC_HAVE_FLUSH -O
  ldflags = -Wl,-export-dynamic -O
  libs = -lfvm -lm -lcgns -lmedC -lhdf5 -lmei -lbft -lz -lxml2 -lblas -L/usr/lib/gcc/i486-linux-gnu/4.4.3 -L/usr/lib/gcc/i486-linux-gnu/4.4.3/../../../../lib -L/lib/../lib -L/usr/lib/../lib -L/usr/lib/gcc/i486-linux-gnu/4.4.3/../../.. -lgfortranbegin -lgfortran -lm -ldl
  rpath = -Wl,-rpath -Wl,

Compilers and associated options for SYRTHES build:
  cc = /usr/bin/gcc
  fc = /usr/bin/gfortran
  cppflags = -I/usr/lib/syrthes/3.4.2/include
  cflags = -O2 -D_FILE_OFFSET_BITS=64 -DHAVE_C_IO
  fcflags = -O2 -DHAVE_C_IO -D_FILE_OFFSET_BITS=64
  ldflags = -L/usr/lib/syrthes/3.4.2/lib/Linux
  libs = -lbft -lz -lsatsyrthes3.4.2_Linux -lsyrthes3.4.2_Linux -L/usr/lib/gcc/i486-linux-gnu/4.4.3 -L/usr/lib/gcc/i486-linux-gnu/4.4.3/../../../../lib -L/lib/../lib -L/usr/lib/../lib -L/usr/lib/gcc/i486-linux-gnu/4.4.3/../../.. -lgfortranbegin -lgfortran -lm
salad@ubuntu:~$ code_saturne create -s STUDY -c CASE
Code_Saturne 2.0.0-rc1 study/case generation
  o Creating study 'STUDY'...
  o Creating case 'CASE'...

We see the MPI library information is blank, as the package currently miss MPI support (this will hopefully be corrected before final release).

SALOME

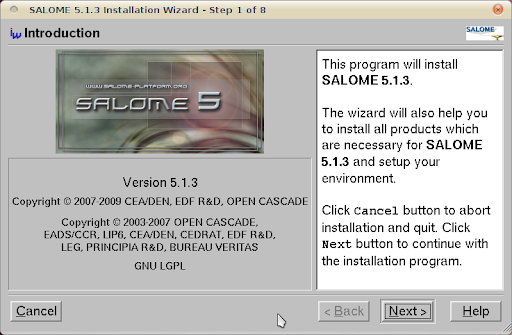
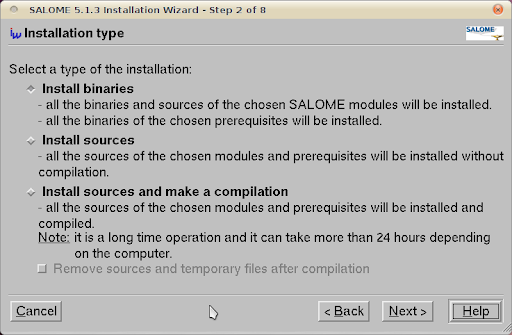
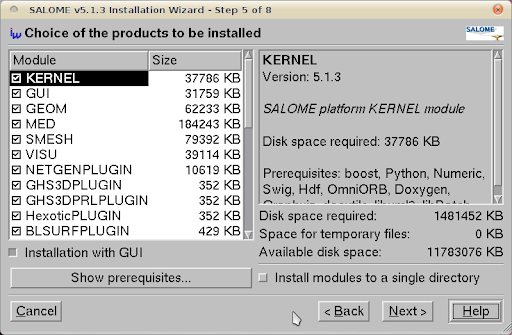
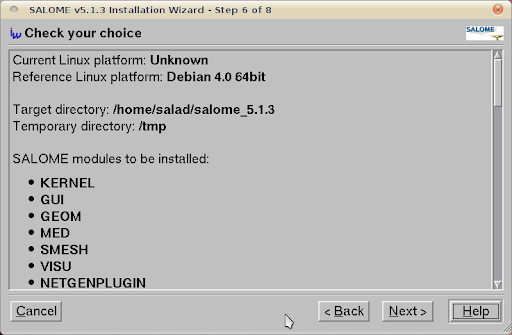
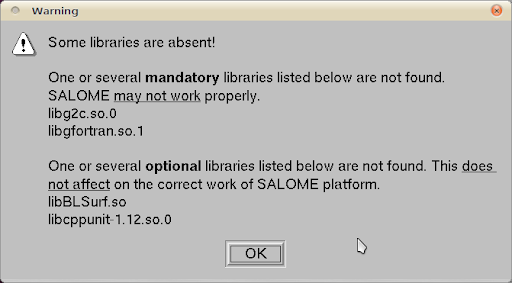
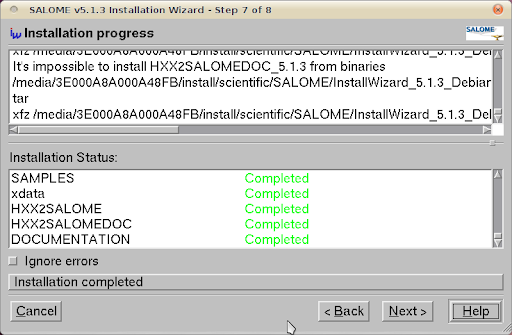
Ledru said SALOME has just been uploaded into Debian. (see the first comment of "Installation of SALOME 5.1.3 on Ubuntu 10.04 (64 bit)") That is right; there is a package salome but there is no source containing it. Let's hope for it.

salad@ubuntu:~$ sudo apt-get install salome
Reading package lists... Done
Building dependency tree
Reading state information... Done
Package salome is not available, but is referred to by another package.
This may mean that the package is missing, has been obsoleted, or
is only available from another source
E: Package salome has no installation candidate

ParaView

apt-get install paraview can install paraview 3.4.0 at the moment. Although the latest version is already 3.8.0, a not-quite-old 3.4.0 is pretty enough if want to enjoy the ease of apt-get.

salad@ubuntu:~$ type paraview
paraview is hashed (/usr/bin/paraview)
salad@ubuntu:~$ paraview --version
ParaView3.4

Saturday 22 May 2010

A short test on the code efficiency of CUDA and thrust

Introduction

Numerical simulations are always pretty time consuming jobs. Most of these jobs take lots of hours to complete, even though multi-core CPUs are commonly used. Before I can afford a cluster, how to dramatically improve the calculation efficiency on my desktop computers to save computational effort became a critical problem I am facing and dreaming to achieve.

NVIDIA CUDA seems more and more popular and potential to solve the present problem with the power released from GPU. CUDA framework provides a modified C language and with its help my C programming experiences can be re-used to implement numerical algorithms by utilising a GPU. Whilst thrust is a C++ template library for CUDA. thrust is aimed at improving developers' development productivity; however, the code execution efficiency is also of high priority for a numerical job. Someone stated that code execution efficiency could be lost to some extent due to the extra cost from using the library thrust. To judge this precisely, I did a series of basic tests in order to explore the truth. Basically, that is the purpose of this article.

My personal computer is a Intel Q6600 quad core CPU plus 3G DDR2 800M memory. Although I don't have good hard drives, marked only 5.1 in Windows 7 32 bit, I think in this test of the calculation of the summation of squares, the access to hard drives might not be significant. The graphic card used is a GeForce 9800 GTX+ with 512M GDDR3 memory. The card is shown as


Algorithm in raw CUDA

The test case I used is solving the summation of squares of an array of integers (random numbers ranged from 0 to 9), and, as I mentioned, a GeForce 9800 GTX+ graphic card running within Windows 7 32-bit system was employed for the testing. If in plain C language, the summation could be implemented by the following loop code, which is then executed on a CPU core:

int final_sum = 0;
for (int i = 0; i < DATA_SIZE; i++) {
    final_sum += data[i] * data[i];
}

Obviously, it is a serial computation. The code is executed in a serial stream of instructions. In order to utilise the power of CUDA, the algorithm has to be parallelised, and the more parallelisation are realised, the more potential power will be explored. With the help of my basic understanding on CUDA, I split the data into different groups and then used the equivalent number of threads on the GPU to calculate the summation of the squares of each group. Ultimately results from all the groups are added together to obtain the final result.

The algorithm designed is briefly shown in the figure


The consecutive steps are:

1. Copy data from the CPU memory to the GPU memory.

cudaMemcpy(gpudata, data, sizeof(int) * DATA_SIZE, cudaMemcpyHostToDevice);

2. Totally BLOCK_NUM blocks are used, and in each block THREAD_NUM threads are produced to perform the calculation. In practice, I used THREAD_NUM = 512, which is the greatest allowed thread number in a block of CUDA. Thereby, the raw data are seperated into DATA_SIZE / (BLOCK_NUM * THREAD_NUM) groups.

3. The access to the data buffer is designed as consecutive, otherwise the efficiency will be reduced.

4. Each thread does its corresponding calculation.

shared[tid] = 0;
for (int i = bid * THREAD_NUM + tid; i < DATA_SIZE; i += BLOCK_NUM * THREAD_NUM) {
    shared[tid] += num[i] * num[i];
}

5. By using shared memory in the blocks, sub summation can be done in each block. Also, the sub summation is parallelised to achieve as high execution speed as possible. Please refer to the source code regarding the details of this part.

6. The BLOCK_NUM sub summation results for all the blocks are copied back to the CPU side, and they are then added together to obtain the final value

cudaMemcpy(&sum, result, sizeof(int) * BLOCK_NUM, cudaMemcpyDeviceToHost);

int final_sum = 0;
for (int i = 0; i < BLOCK_NUM; i++) {
    final_sum += sum[i];
}

Regarding the procedure, function QueryPerformanceCounter records the code execution duration, which is then used for comparison between the different implementations. Before each call of QueryPerformanceCounter, CUDA function cudaThreadSynchronize() is called to make sure that all computations on the GPU are really finished. (Please refer to the CUDA Best Practices Guide §2.1.)

Algorithm in thrust

The application of the library thrust could make the CUDA code as simple as a plain C++ one. The usage of the library is also compatible with the usage of STL (Standard Template Library) of C++. For instance, the code for the calculation on GPU utilising thrust support is scratched like this:

thrust::host_vector<int> data(DATA_SIZE);
srand(time(NULL));
thrust::generate(data.begin(), data.end(), random());

cudaThreadSynchronize();
QueryPerformanceCounter(&elapsed_time_start);

thrust::device_vector<int> gpudata = data;

int final_sum = thrust::transform_reduce(gpudata.begin(), gpudata.end(),
    square<int>(), 0, thrust::plus<int>());

cudaThreadSynchronize();
QueryPerformanceCounter(&elapsed_time_end);
elapsed_time = (double)(elapsed_time_end.QuadPart - elapsed_time_start.QuadPart)
    / frequency.QuadPart;

printf("sum (on GPU): %d; time: %lf\n", final_sum, elapsed_time);

thrust::generate is used to generate the random data, for which the functor random is defined in advance. random was customised to generate a random integer ranged from 0 to 9.

// define functor for
// random number ranged in [0, 9]
class random
{
public:
    int operator() ()
    {
        return rand() % 10;
    }
};

In comparison with the random number generation without thrust, the code could however not be as elegant.

// generate random number ranged in [0, 9]
void GenerateNumbers(int * number, int size)
{
    srand(time(NULL));
    for (int i = 0; i < size; i++) {
        number[i] = rand() % 10;
    }
}

Similarly square is a transformation functor taking one argument. Please refer to the source code for its definition. square was defined for __host__ __device__ and thus it can be used for both the CPU and the GPU sides.

// define transformation f(x) -> x^2
template <typename T>
struct square
{
    __host__ __device__
        T operator() (T x)
    {
        return x * x;
    }
};

That is all for the thrust based code. Is it concise enough? :) Here function QueryPerformanceCounter also records the code duration. On the other hand, the host_vector data is operated on CPU to compare. Using the code below, the summation is performed by the CPU end:

QueryPerformanceCounter(&elapsed_time_start);

final_sum = thrust::transform_reduce(data.begin(), data.end(),
    square<int>(), 0, thrust::plus<int>());

QueryPerformanceCounter(&elapsed_time_end);
elapsed_time = (double)(elapsed_time_end.QuadPart - elapsed_time_start.QuadPart)
    / frequency.QuadPart;

printf("sum (on CPU): %d; time: %lf\n", final_sum, elapsed_time);

I also tested the performance if use thrust::host_vector<int> data as a plain array. This is supposed to cost more overhead, I thought, but we might be curious to know how much. The corresponding code is listed as

final_sum = 0;
for (int i = 0; i < DATA_SIZE; i++)
{
    final_sum += data[i] * data[i];
}

printf("sum (on CPU): %d; time: %lf\n", final_sum, elapsed_time);

The execution time was recorded to compare as well.

Test results on GPU & CPU

The previous experiences show that GPU surpasses CPU when massive parallel computation is realised. When DATA_SIZE increases, the potential of GPU calculation will be gradually released. This is predictable. Moreover, do we lose efficiency when we apply thrust? I guess so, since there is extra cost brought, but do we lose much? We have to judge from the comparison results.

When DATA_SIZE increases from 1 M to 32 M (1 M equals to 1 * 1024 * 1024), the results obtained are illustrated as the table


The descriptions of the items are:
  • GPU Time: execution time of the raw CUDA code;
  • CPU Time: execution time of the plain loop code running on the CPU;
  • GPU thrust: execution time of the CUDA code with thrust;
  • CPU thrust: execution time of the CPU code with thrust;
  • CPU '': execution time of the plain loop code based on thrust::
    host_vector
    .
The corresponding trends can be summarised as


or compare them by the column figure


The speedup of GPU to CPU is obvious when DATA_SIZE is more than 4 M. Actually with greater data size, much better performance speedup can be obtained. Interestingly, in this region, the cost of using thrust is quite small, which can even be neglected. However, on the other hand, don't use thrust on the CPU side, neither thrust::transform_reduce method nor a plain loop on a thrust::host_vector; according to the figures, the cost brought is huge. Use a plain array and a loop instead.

From the comparison figure, we found that the application of thrust not only simplifies the code of CUDA computation, but also compensates the loss of efficiency when DATA_SIZE is relatively small. Therefore, it is strongly recommended.

Conclusion

Based on the tests performed, apparently, by employing parallelism, GPU shows greater potential than CPU does, especially for those calculations which contains much more parallel elements. This article also found that the application of thrust does not reduce the code execution efficiency on the GPU side, but brings dramatical negtive changes in the efficiency on the CPU side. Consequently, it is better using plain arrays for CPU calculations.

In conclusion, the usage of thrust feels pretty good, because it improves the code efficiency, and with employing thrust, the CUDA code can be so concise and rapidly developed.

ps - This post can also be referred from one of my articles published on CodeProject, "A brief test on the code efficiency of CUDA and thrust", which could be more complete and source code is attached as well. Any comments are sincerely welcome.

Additionally, the code was built and tested in Windows 7 32 bit plus Visual Studio 2008, CUDA 3.0 and the latest thrust 1.2. One also needs a NVIDIA graphic card as well as CUDA toolkit to run the programs. For instructions on installing CUDA, please refer to its official site CUDA Zone.

Sunday 2 May 2010

Installation of SALOME 5.1.3 on Ubuntu 10.04 (64 bit)

NEW - According to your feedback in the comment list and my own experience, the present tutorial works with SALOME 5.1.5 on Ubuntu 10.10, Kubuntu 10.10 and the latest Ubuntu 11.04.

NEW - As the feedback from vaina, the present tutorial also works with the latest SALOME 5.1.4 on Ubuntu 10.04.

On 23 April 2010, I received the SALOME Newsletter and surprisingly read that they are advising my blog "Free your CFD" for my introduction on SALOME on different platforms. I feel pretty glad and deeply honored because this is definitely the first time I obtain acknowledgement from the SALOME official after my effort during the past more than one years. The part below is from the newsletter.

salome logo Welcome to the April 2010 SALOME Newsletter
...

Solvers' corner

...

"Free your CFD"

Have you bookmarked this blog. It provides useful information and tutorials on Code_Saturne and SALOME.
...
Salome platform logo

To thank you for your support and to celebrate the recent release of the latest Ubuntu 10.04 LTS, I summarise the two previous posts "Installation of SALOME 5.1.1 on Ubuntu 9.04" and "Installation of SALOME 5.1.2 on (K)Ubuntu 9.10 64 bit", test the installation procedure of SALOME version 5.1.3 on Ubuntu 10.04 (64 bit), hereby share my experience and hope it truly helps.

1. Preparation. Although a "Universal binaries for Linux" was released, I still suggest to use the install wizard version to install SALOME, because both of the source code and the corresponding pre-compiled binaries of the necessities are all shipped with the package, and thus it is even possible to share these libraries with Code_Saturne (see "Compile Code_Saturne with SALOME binary libraries").

Install the g++ compiler as SWIG has to be built from source.

:/$ sudo apt-get install build-essential

Replace the executable "sh" with "bash" to avoid some trivial errors.

:/$ sudo rm /bin/sh
:/$ sudo ln -s /bin/bash /bin/sh

Additionally, if it is for a 64 bit Linux, because the install wizard was written for 32 bit, a package ia32-libs is also necessary. It is of course not needed if the Linux environment is 32 bit version.

:/$ sudo apt-get install ia32-libs

Otherwise an error could be encounterred on the console when trying to launch the install wizard.

sh: ./bin/SALOME_InstallWizard: No such file or directory

2. Install. Download the install wizard package and extract it. Ship into the extracted directory and then execute runInstall.

:/$ ./runInstall

Sequentially, the wizard contained 8 steps, for which the screenshots below illustrate. Step 7 is for install progress. After it is started, during the install procedure, there will a warning dialog, shown below as well, poped out, complaining two compulsory libraries, libg2c and libgfortran, haven't been found. Click "OK", ignore the warning and procede until finish the last step of the wizard.


3. Post-install. SALOME has been installed into the $HOME directory; run salome_appli_5.1.3/runAppli to launch the software. However, before the first launch, remember to create a directory USERS under the salome_appli_5.1.3 to avoid an error.

:/$ mkdir salome_appli_5.1.3/USERS
:/$ salome_appli_5.1.3/runAppli &

Up to now, launch SALOME and try to enable the MESH module, an error, shown below, is seen. This is because libg2c and libgfortran are still missing in the system.


To add libgfortran, sequentially execute (note that for Ubuntu 11.04, the libgfortran is in /usr/lib/x86_64-linux-gnu instead of /usr/lib)

:/$ sudo apt-get install gfortran
:/$ sudo ln -s /usr/lib/libgfortran.so.3 /usr/lib/libgfortran.so.1
:/$ sudo ldconfig
:/$ sudo updatedb

To add libg2c, download the packages libg2c0 and gcc-3.4-base (the latter actually provides a dependency for the former one) which suit the system, i386 or amd64, and then install both by dpkg command. For instance, on my Ubuntu 64 bit, execute

:/$ sudo dpkg -i gcc-3.4-base_3.4.6-8ubuntu2_amd64.deb libg2c0_3.4.6-8ubuntu2_amd64.deb

Finally SALOME is supposed to work well.